How to Use a Coleman Camp Stove
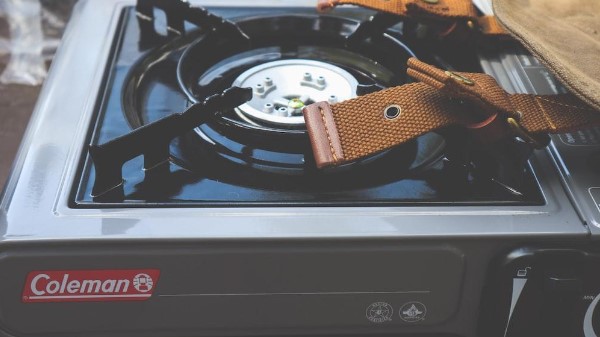
Coleman camp stoves are a popular choice for outdoor cooking and camping enthusiasts. These stoves are reliable, easy to use, and provide a convenient way to prepare meals in the great outdoors. Whether you’re a seasoned camper or new to the camping scene, it’s important to know how to properly and safely use a Coleman camp stove.
In this article, we will walk you through the steps of how to use Coleman camp stove, light it, and provide some valuable tips for efficient use. So let’s get started!
Table of Contents
Step 1: Prepare the Stove
Before you begin using your Coleman camp stove, it’s important to ensure that it is clean and in good working condition. Remove any dirt or grime from the stove by spraying it down with water. Take the time to inspect the stove for any damages or signs of wear and tear. If you notice any issues, such as rusted parts or leaks, it’s best to address them before using the stove.
Step 2: Hook Up the Propane Cylinder
To use a Coleman camp stove, you’ll need to hook up a propane cylinder. Start by removing the cap from the propane cylinder and check for any signs of damage or leaks. Align the nipple from the regulator into the top of the propane cylinder and twist it clockwise until it is seated firmly.
Make sure there are no leaks by applying soapy water to all of the connection points. If you see bubbles forming, there is a leak and you should disconnect and reconnect the attachment points until the leak is fixed. Have a look at this video for a visual demonstration.
Step 3: Check for Proper Functioning
Before lighting the stove, it’s important to check that everything is functioning properly. Turn on each burner separately for a few seconds to ensure that propane is flowing without obstruction. This step will also help you identify any blockages or issues with the burners.
Additionally, make sure that the valve wheel is turned fully clockwise to the closed position and that the pump handle has resistance when pressed down. If you encounter any problems during this step, it’s best to address them before proceeding.
Step 4: Light the Stove
Now that you have ensured that the stove is in good working condition, it’s time to light it up. Start by turning the lighting lever to the up position. Open the fuel valve one full turn and wait for a few seconds. You should see a stream of gasoline shooting out from the end of the generator.
Once the fuel starts flowing, close the valve and set the tank aside. Light a match or lighter and hold it over the master burner. Open the valve fully and within 10 seconds, the master burner should ignite. Allow it to burn for about 30 seconds until the flames settle down into smaller blue flames. Repeat this process for the auxiliary burners if your stove has multiple burners.
Step 5: Adjust the Flame and Cook
Once the stove is lit, you can adjust the flame by using the valve. Refer to the owner’s manual for your specific stove model for detailed instructions on adjusting the flame. Now, you’re ready to start cooking! Place your pots or pans on the burners and begin preparing your meals. Remember to always keep an eye on the stove while it is in use and never leave it unattended.
On the note of meals, make sure you have all the necessary ingredients to make your campsite dinners. You can even read other camping food ideas for your trip and kids.
Step 6: Disassembly and Safety Precautions
When you’re finished cooking, it’s important to follow proper disassembly procedures and take safety precautions. Start by turning off all burners and allowing them to cool down. Unscrew the propane cylinder and check for any leaks. If you detect a leak, screw the cylinder back in and try to fix the issue.
After detaching the cylinder, remove the regulator piece and make sure to release any remaining pressure by opening the valve. Store your stove and accessories properly to ensure their longevity and prevent any accidents.
How Long Will a 1lb Canister Last?
One of the common questions campers have is how long a 1lb propane canister will last when using a Coleman camp stove. The duration depends on the BTU output of your stove and the canister’s BTU capacity. To calculate the approximate duration, divide the canister’s BTU capacity by the stove’s BTU output.
For example, if your stove uses 20,000 BTUs and your canister has a capacity of 22,000 BTUs, you can expect it to last around 1 hour and 6 minutes. Keep in mind that using the stove on low or medium heat will extend the runtime.
Hooking Up to a 20lb Tank
If you prefer to use a larger propane tank with your Coleman camp stove, it is possible with the right adapter and hose. To hook it up, follow similar steps as hooking up a 1lb propane cylinder. Instead of screwing the cylinder into the regulator, screw one end of the adapter hose into the 20lb propane tank and the other end into the regulator.
Make sure to use the correct adapter and hose for a safe and secure connection. You can find these accessories online or at outdoor supply stores.
How to Use Coleman Camp Stove: Safety Tips and Indoor Use Disclaimer
Learning how to use Coleman camp stove isn’t enough; you need to prioritize safety at all times. Coleman camp stoves are designed for outdoor use only and should never be used indoors. Using a stove indoors can lead to carbon monoxide poisoning, fire hazards, and other dangers.
It’s crucial to have proper ventilation and avoid cooking with an open flame in confined spaces. Always follow the manufacturer’s instructions and use common sense when operating a camp stove.
How to Use Coleman Camp Stove: Final Thoughts
In conclusion, using a Coleman camp stove is a convenient and efficient way to cook delicious meals while enjoying the outdoors. By following the steps on how to use Coleman camp stove, you can safely and effectively use your stove to prepare meals during your camping adventures. Remember to always prioritize safety, perform regular maintenance, and enjoy the experience of cooking in the great outdoors with your Coleman.

Meet Sarah, a passionate traveler and camping enthusiast who loves to explore the great outdoors. With years of exploring, she has become an expert in testing and reviewing the best tents on the market which got her to start mytravelingtents.com. Her insightful reviews provide valuable information to fellow adventurers looking for the perfect tent for their next camping trip.


