How to Make an Outdoor Canopy Tent: A Comprehensive Guide
Canopy tents are getting popular every day. All who used these, plus those who haven’t, claim it to be one of the most convenient tents out there. If you want to join in the hype and want to know how to make an outdoor canopy tent then you have come to the right place.
In this article, we will take look at the different ways you can build your very own outdoor canopy tent with a detailed step-by-step guide. So, without further ado, let’s dive into the details, shall we? Even check out our article on how you can make a tent at home
Creating your own outdoor canopy tent can be a fun and cost-effective way to add shade and style to your backyard or patio. Whether you’re looking for a cozy spot to relax, a shaded play area for kids, or a stylish addition to your outdoor living space, there are several DIY options to choose from. In this comprehensive guide, we’ll explore different methods for making an outdoor canopy tent, including step-by-step instructions, pros and cons, and links to helpful resources.
Table of Contents
1. DIY Adjustable Sun Tracking Canopy
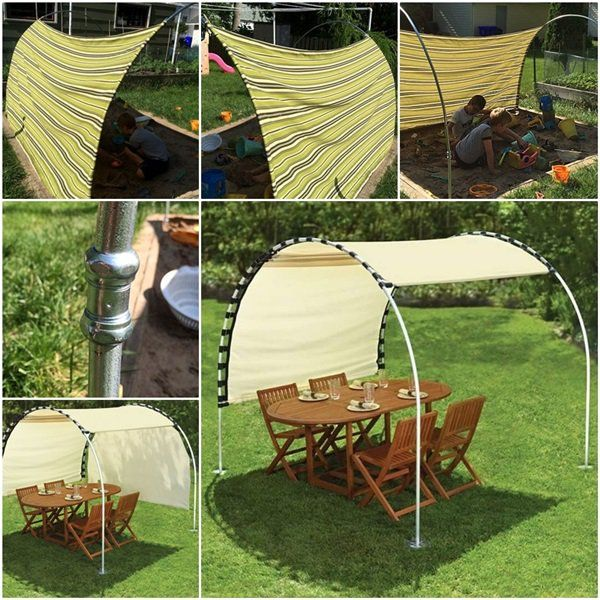
One unique approach is to create an adjustable sun tracking canopy, as demonstrated in this DIY project from My Happy Crazy Life. This canopy is designed to move along metal arches as the sun changes position throughout the day, providing optimal shade coverage. To make this canopy, you’ll need:
- PVC pipe (rigid for legs, flexible for arches)
- PVC connectors
- Outdoor fabric (3 yards recommended for an 8′ sandbox)
The fabric canopy is relatively easy to construct, with the most challenging aspect being ensuring accurate measurements. The pockets for the arches are created by folding and topstitching the fabric, making this a great option for those with basic sewing skills
Pros:
- Adjustable to track the sun’s movement
- Customizable fabric choice
- Relatively simple construction
Cons:
- Requires some sewing skills
- May need to sand PVC connectors to fit different pipe sizes
2. Pergola Curtain Canopy
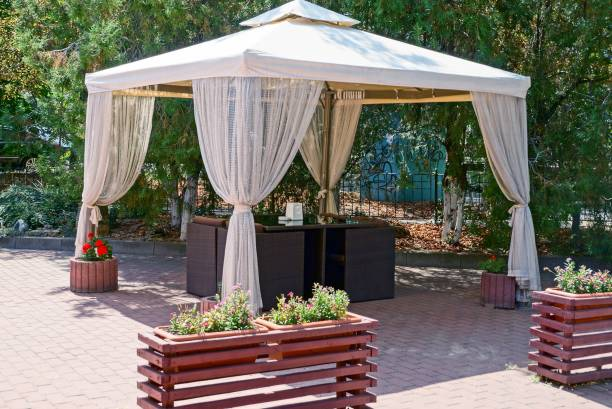
Another option is to transform an existing pergola or similar structure into a cozy cabana-style retreat by adding DIY curtains, as demonstrated by Laura Gummerman of A Beautiful Mess. This project is perfect for those who already have a pergola or similar framework in place.To create this look, you’ll need:
- Weather-resistant outdoor fabric or curtains (Sunbrella or treated cotton)
- Cup hooks or other fasteners
The curtains are easily attached to the pergola using cup hooks, creating a secluded and cozy space. Laura recommends using outdoor fabric for durability, but notes that regular cotton fabric treated with a waterproofing spray can also work well
Pros:
- Transforms an existing structure
- Adds a cozy, cabana-like feel
- Relatively simple installation
Cons:
- Requires an existing pergola or similar structure
- Fabric choice may be limited by budget
3. Shade Sail Canopy
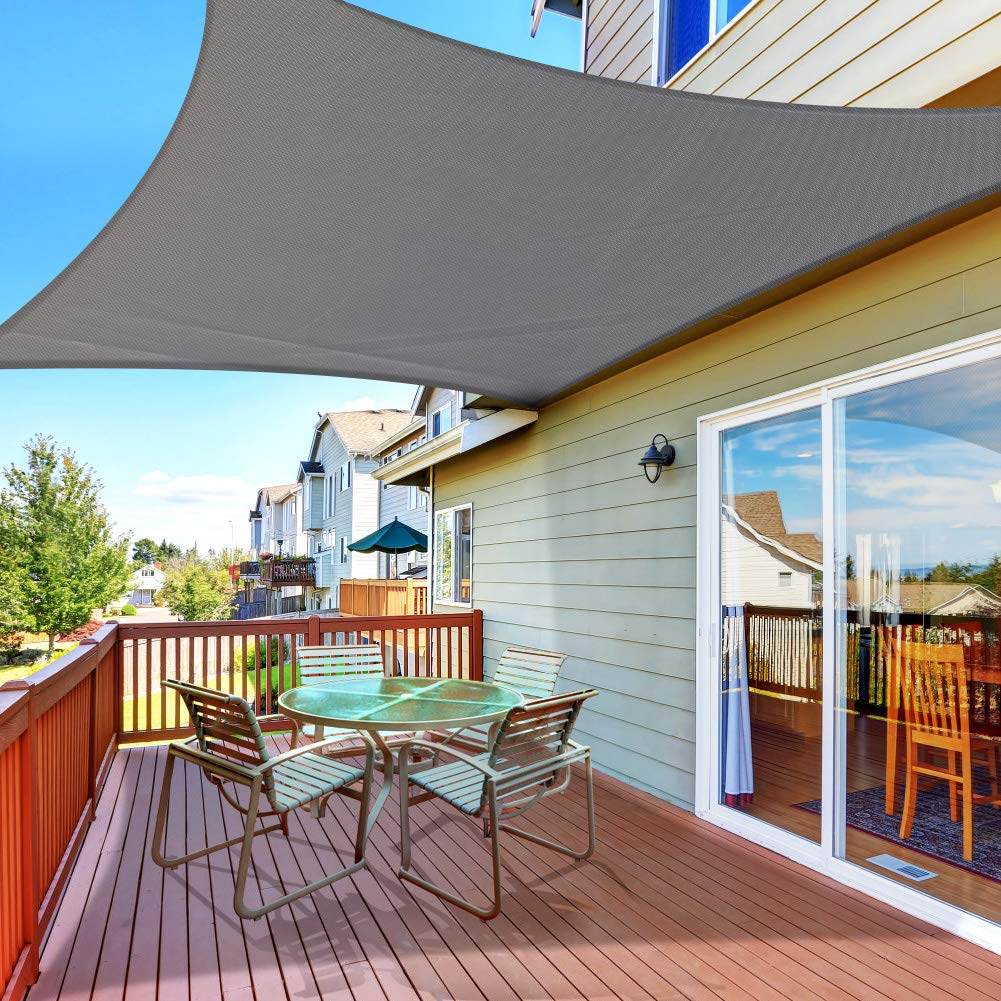
For larger spaces or small patio ideas, a shade sail canopy can be a great DIY option. You can either purchase pre-made shade sails and hang them as desired (with IKEA hacks being a popular affordable choice), or create your own using outdoor fabric. To make your own shade sail canopy, you’ll need:
- Outdoor fabric (size depends on desired coverage area)
- Grommets or other fasteners
- Posts, walls, or fences to attach the sail to
Creating your own shade sail allows for customization of size and shape, and can be a more budget-friendly option than purchasing pre-made sails. Once the sail is constructed, it can be hung from posts, walls, or fences using the grommets or other fasteners
Pros:
- Customizable size and shape
- Can be hung from various structures
- Provides good coverage for larger areas
Cons:
- Requires some sewing skills and tools (like a grommet setter)
- May need to purchase additional hardware for hanging
4. DIY Canopy Daybed
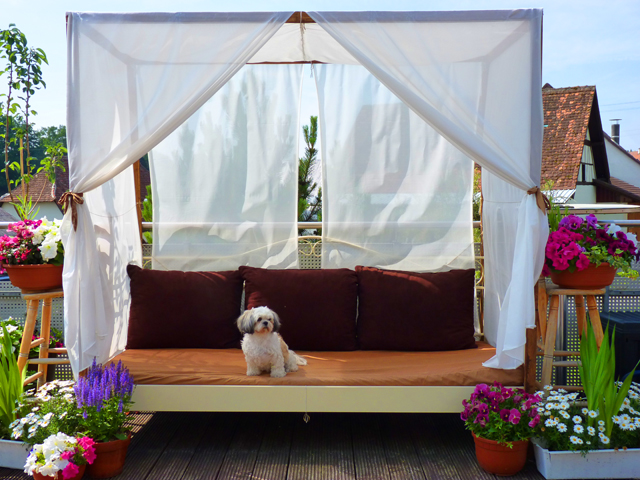
For a luxurious and relaxing addition to your outdoor space, consider creating your own canopy daybed, as demonstrated by Sara of @sarashomehaven. This project is perfect for those who want a cozy spot to unwind and enjoy the outdoors. To make a canopy daybed, you’ll need:
- Wooden frame (can be built using leftover wood)
- Cushions (seat and back)
- Canopy fabric (an old curtain works well)
- Decorative pillows and accessories
Sara’s husband built the wooden daybed frame using leftover wood, while Sara created the cushions using a mix of white and greige linen fabric. For the canopy, she used an old curtain that was folded and hung over the top of the daybed
Pros:
- Provides a comfortable and relaxing spot
- Customizable with various fabrics and cushions
- Can be built using repurposed materials
Cons:
- Requires some woodworking skills to build the frame
- Cushions may need to be professionally made for best results
5. Dreamy Canopy Tent for Kids
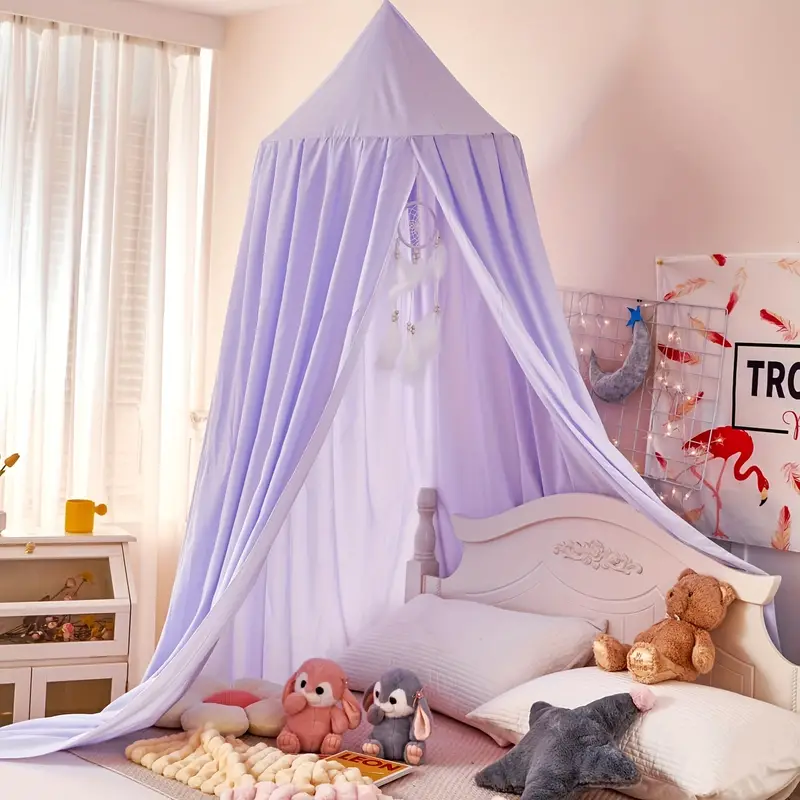
If you’re looking for a quick and easy project to delight your little ones, consider making a dreamy canopy tent, as demonstrated by HowDoesShe. This project requires just three items and can be completed in about 10 minutes.To make this canopy tent, you’ll need:
- 3 packages of lightweight curtains (like IKEA LILL)
- 1 large embroidery hoop
- Ribbon
The curtains are slid onto the embroidery hoop, which is then reassembled and hung from the ceiling using ribbon. This creates a whimsical and inviting space for kids to play and imagine
Pros:
- Extremely quick and easy to make
- Requires minimal materials
- Perfect for kids’ play areas
Cons:
- May not be as durable as other options
- Hanging from the ceiling may not be suitable for all spaces
Conclusion
Making your own outdoor canopy tent is a great way to add shade, style, and functionality to your backyard or patio. Whether you choose to create an adjustable sun tracking canopy, transform an existing pergola, build a shade sail, construct a luxurious canopy daybed, or make a dreamy tent for kids, there are plenty of DIY options to suit your needs and skill level. Remember to consider factors like available space, budget, and desired aesthetic when selecting your project. With some creativity and a little elbow grease, you can create a beautiful and functional outdoor canopy tent that will provide years of enjoyment.
Frequently Asked Questions (FAQs)
1. What materials are best for outdoor canopies?
For outdoor canopies, it’s best to use weather-resistant materials such as polyester, canvas, or treated cotton. These fabrics are durable and can withstand exposure to the elements. Additionally, using PVC or treated wood for the frame can enhance durability.
2. How do I secure my canopy tent against wind?
To secure your canopy tent against wind, consider using stakes or weights at each corner. You can also add guy lines (ropes) that are anchored to the ground to provide additional stability. Make sure to choose a location that is sheltered from strong winds whenever possible.
3. Can I use regular fabric for my outdoor canopy?
While you can use regular fabric for an outdoor canopy, it’s advisable to treat it with a waterproofing spray to enhance its durability. However, for best results and longevity, opt for outdoor-specific fabrics that are designed to resist fading and moisture.
4. How do I clean my outdoor canopy?
Cleaning your outdoor canopy typically involves a gentle wash with mild soap and water. Avoid harsh chemicals that can damage the fabric. For stubborn stains, a soft brush can be used. Always allow the canopy to dry completely before folding or storing it.
5. How long does it take to build a DIY canopy tent?
The time it takes to build a DIY canopy tent varies depending on the complexity of the design. Simple projects, like a curtain canopy, can take as little as 10 minutes, while more elaborate structures like a daybed or shade sail may take several hours to complete. Always plan for extra time for measuring and adjustments.Feel free to reach out if you have more questions or need further assistance with your outdoor canopy tent project! Happy crafting!

Meet Sarah, a passionate traveler and camping enthusiast who loves to explore the great outdoors. With years of exploring, she has become an expert in testing and reviewing the best tents on the market which got her to start mytravelingtents.com. Her insightful reviews provide valuable information to fellow adventurers looking for the perfect tent for their next camping trip.